Choosing a Teacher

Photo credit: Baher Khairy

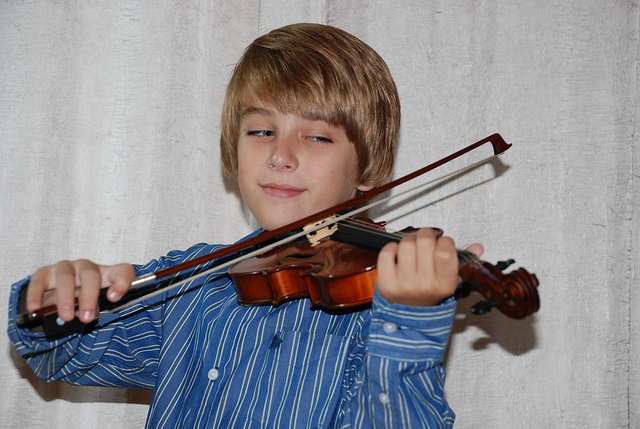
Before you try to choose a teacher, stop, take a big breath, allow yourself time to consider what you want in a teacher.

There are all kinds of people in the world and that includes teachers, parents and kids who are the potential recipients of the music lessons. A few of the questions you might ask yourself could include (and please be honest for your and your child’s sake! There are no right or wrong answers. You are you and that is who you are supposed to be. Just be as honest as you possibly can!):

  • How much time each week am I willing to devote to helping my child with this project? The child probably needs help clearing out time as well as other details to meet the time demands of learning an instrument.
  • Am I willing to sit through the lesson with the teacher and child and ask about what I don’t understand so that I can work with my child at home? This is important for the parent to think through so that he/she can then seek a teacher who is willing to work with parent and child or one who would rather have the child dropped off and picked up at the end of the lesson.
  • Do I want my child to experience a caring teacher who has a plan of action and result-oriented goals around building technique on the instrument as well as fundamental music theory so that my child advances systematically and can handle Royal Conservatory of Music exams in Canada or in the American String Teachers Certificate Advancement exams in the US?
  • Do I want my child to be able to understand and perform at the level of the Youth Orchestra he/she may join? Do I want a teacher who is willing to answer questions and help with specific orchestra playing needs?
  • Would I rather have a teacher who is nice and fun no matter what happens at home or at the lesson and never places expectations on the child?
  • Would I rather have my child do a little of all kinds of activities or stick with one or two things and get good at what they are doing? This question deserves a well thought out answer.

So far the ideas under discussion have been about parental attitudes. It’s time to give attention to the child’s ideas:

  • Does this child enjoy music?
  • Does he/she enjoy learning new activities, ideas, skills?
  • Has he/she attended any concerts, orchestral, chamber music, church choir, youth orchestra or (good thought!) a student recital of a prospective teacher.

All of these experiences could help a youngster see himself/herself in these settings and come up with a meaningful reaction.

After considering these questions, you want to find a music teacher who is a match for your own preferences. Asking yourself these questions helps you get clear on what you want (and on what you and your child are motivated to do). Write down what is important for you and your child and go and meet with a few prospective teachers to ask meaningful questions and determine if you are a good match.

May you be blessed in your considerations and decisions!

Check out the related post on new students materials checklist.

SAA Conference and Improvisation

I attended the Suzuki Association of the Americas 2014 Conference in Minneapolis, MN, held May 22 to 26. I was delighted to find other people doing improvisation with young children there and holding sessions on their experiences.

The first one I heard was John Hamil from the Kansas City area. He is a bassist and teaches young children as well as older ones. He brings them into improvisation by means of some of the basic bassist skills needed in pop band gig work. He then develops these concepts into more advanced techniques. That sounds practical to me.

The next Improvisation session I attended was was done by Lisa Rebecca Caravan and Meredith Blecha-Wells, both cellists. They worked with cello students to show how they start improvisation work in their studios. They also start with basic skills that the beginning student has and give them a new idea; make something up within a given framework/key. Then they moved on to more parts of the improvisation set up. The kids pick it up easily when we start simply and they feel at ease.

The third Improvisation session I attended was given by Nancy Modell of Springfield, NJ. She brought video recordings of her piano students performing their compositions. She explained how she leads them to composition by way of improvisation, which of course is a natural progression. She has them perform their pieces in a performance setting, for parents and friends. They love the sense of accomplishment.

I was so excited by being able to watch others teach improvisation and talk about what they are doing. I don’t feel like I’m the only one with this idea. I’m happy that the idea is gaining traction in studios around the country.

Why Teach Improvisation?

In the booklet I recently prepared on music improvisation/applied theory, I related the following anecdote about asking a question of Dr. Suzuki.

The last year that Dr. Suzuki came to the American Suzuki Institute in Steven’s Point, Wisconsin, I was there. When we were given a chance to ask our questions, I asked about sight reading musical notation, as there was at that time, some question as to whether we Suzuki teachers should be teaching this skill. He inquired as to whether the children in my area learned to read musical notation at school. I replied that not always did they learn this skill at school. Where upon, he brightened and replied,

“Whatever the student needs to know, the teacher needs to teach.”

This has been my guiding principle in all of my teaching. So, because improvisation is more and more a required skill for young musicians, I propose that we need to introduce it early on, as we do the other skills that we need to develop. Let’s take on the challenge of the present!

Alice Kay Kanack has developed a very informative improvisation method for piano students and also extended it to violin (see Fun Improvisation for…Violin, Viola, Cello, Piano). She does a very good job of laying out the philosophy and method of creative development. I highly recommend her books! She also makes the very well placed point that the famous classical music composers such as Hayden, Beethoven and Mozart all practiced improvisation exercises as young students. It is self evident that improvisation feeds into composing skills. With all this in mind, what I am proposing is an approach more through the use of Theory of Music. As soon as the student can play the first one octave scale with ease, he/she can use those notes as building blocks, mix them up and make up/improvise something. At first the attempt may sound labored and inert, but the student is becoming aware of the sounds of different consecutive intervals and what he/she likes better and they start to develop and use their imagination and get adventurous. Things get interesting and fun.

Improvisation of an Accompaniment

Photo credit: Meredith Bell

To start working with the idea of harmonic accompaniment to tunes or improvisation, I start with “Twinkle Twinkle” in A major. I make sure the student understands the A major scale and arpeggio set.

Next, I give them a simple accompaniment pattern and show how to put it in all keys. Here is an example. Then I also give them a chord chart. The part marked “guitar” contains all the first position notes the violin player can choose from for the pattern. Of course not even the guitar plays all the notes given. The letter names above the chords indicate the name of the chord as the guitar player uses it. The roman numerals below the chords indicate their relationship to the A Major scale.

The first pattern on the “Patterns and Keys” document gives the chord patterns beginning on the open strings, G, then move to D and repeat, move to A and repeat. The second pattern starts with the A major chord pattern beginning on the G string. That gets out of the range of the written “Twinkle”. I use this set up until the student can play the accompaniment to “Twinkle” guided by his/her ear. I like for them to be able to do that in D major and G major also. At that point we can try another tune.

Setting up a Beat

For putting a beat with what the kids are playing in their “improv” game, I wait until they have lost any hesitation about trying something new. Then I show them how I might put a beat with something I might play, using my feet to tap out a straight beat, preferably a rather slow beat so as not to intimidate the youngster. The parent can do the same thing with the youngster at home. When they are at ease with that idea we can set up a metronome beat.
Next step would be to set up a meter as in STRONG, weak, weak, STRONG, weak, weak, or other combinations of strong and weak beats, again preferably slow beats to begin with. I do this first by clapping the beats for the student and getting the parent to join me. As the student gets used to this I can then turn to a metronome which is programmed to give meters. I use simple quarter note beats at first as in 2/4, 3/4 or 4/4 meters. We are still on simple little made up tunes of roughly one phrase. We have not set up phrase parameters other than, start on the key note and finish on the key note. I let all of this percolate for a while.

Improvisation and the Suzuki Method

I have been asked before

“How do you get started doing improvisation with the Suzuki Method?”

Well, I answer by explaining the steps I take with each student.
I have my young students learn to play the one octave A major, D major and G major scales, first in pizzicato, and then using rhythmic bow strokes. We sing a little song to learn the scale:

The little train goes up the hill. The little train comes down again.

Singing the notes of the scale to the words above, is quite easy and once they can sing it, they can play it. Once they play it on the violin, I tell them that they have just played the A major scale.

While they are learning the book 1 pieces, I have them use only the notes of one of these scales (they pick which one) to make up a little tune. I like to take advantage of the time and effort they are putting into playing the little folk tunes from the first half of the Suzuki Violin School Book 1. During this time, they are listening to the book 1 CD, also singing words to the tunes and then reproducing the tunes on the violin. I think that is a good time to let them start to make up their own tunes also. When we begin to improvise, we start by mixing up the notes of the scale we have chosen to make one phrase of music. There is only one rule:

“Start on the key note – the first note of the scale you have chosen – and end on the same note. Do whatever you want to in between.”

We keep doing that until it is easy. Then we add meter and when the student is ready, we can use the metronome for the beat.

Then as they learn the arpeggios, we can ease into the use of chords that fit under a tune, i.e. Twinkle. I plan to address these concepts a bit further in my next post.

Below is a another video of brothers Tristan and Zane, playing a fiddle arrangement found in a collection by Carol Ann Wheeler of the folk tune, Go Tell Aunt Rhody, plus improvisation around that tune.

Scales with Twinklers

As most of you know, beginners in the Suzuki method start off learning how to play Twinkle Twinkle Little Star. This  is a very simple and well known children’s song, so chances are, the student can already sing the melody. Because the first set of pieces learned in the Suzuki method are variations on this song, we call our beginners, Twinklers. Our Twinklers can learn their first scale by singing it and I often sing it to the following words, (one syllable for each note in the scale):

“The little train goes up the hill. The little train comes down again.”

(The first sentence is the scale going up and the second is the scale coming back down – one octave.) I will play the scale for them, first pizzicato (i.e. plucking the notes rather than bowing) then the student does the same and practices this at home. Then we can bow a fun rhythm and it can become a monkey song – a good activity to insert between the focused learning tasks.

On the violin the first scales we learn are A major, D major and G major, while on viola it is D major, G major and C major. The student may start his or her scales in pizzicato (this removes the challenge of using the bow correctly, so we can just focus on the notes of the scale in the beginning). Then I have the student go up the scale naming each note as he or she goes, for example:

“A, B, C#, D, E, F#, G#, A”

And they turn around and go back down again.

When they know the names of the notes on their instrument, they are ready to name the notes on the staff and effectively to begin reading music. This is where I recommend using I Can Read Music: A Note Reading Book for Violin Students (Volume 1). (Also available: I Can Read Music: For Viola Volume 1 and I Can Read Music: For Cello, Volume I). I use this book for various activities. When the book is open to lesson one, the Pitch page is on the left and the Rhythm page is on the right. For the Pitch page, the student names the notes and then plays them, one line at a time. For the Rhythm page, the student claps and counts and then plays and counts, one line at a time.

By the middle of the Suzuki Book 1, I have the students put the book on the stand and point to the notes as they listen to the recording and then practice. This is the daily routine.

“Did it Sound Better or Worse?”

As previously mentioned, I spoke as a Suzuki Teacher Trainer to the String Pedagogy class at Colorado State University, about the progression through the Suzuki Violin School Books. One of the topics I covered was intonation.

Intonation needs to stay on the instinctive, intuitive level, so I watch for the first sign that the child hears when the notes sound better or worse. Most children do hear this difference and also subtly let us know that they do and are not quite sure what to do about it. Here is our chance to teach the appropriate basics, which would be, move your finger.

Nine times out of ten, they instinctively move the finger in the right direction and to the best ringing sound. If they do move it the wrong direction, a simple question is:

“Did it sound better or worse?”

In the case of worse, move it the other way. Sometimes I ask the child if the finger needs to move a little more. They very soon get the idea that they can get the pitch/sound that they want.

Finger pattern exercises and scales continue the process as far as pitch is concerned and also note learning on the instrument, which makes note learning on the page pertinent and make sense. For students who are further along in the repertoire, shifting the violin hand into the upper positions follows in line with these basics.

New Student Materials Checklist

When parents ask me what materials will be needed for beginner lessons, I recommend the following items:

  • Notebook and pencil for Mom or Dad, whomever is the practice companion at home;
  • Foot position mat for the child (I show you how to make one);
  • For quite a young child (under 5 years old), a home-made cardboard or a purchased foam “violin” may be used for a short time. This allows the youngster to:
    • Become accustomed to placing and holding the instrument correctly on the shoulder;
    • Learn how to carry and balance the instrument correctly;
    • Learn how to tap fingers in good form; and,
    • Learn how and where to place the “bow.”
  • When the child is ready to use a “real” violin, the teacher can measure the child’s arm to determine the size required. The parent has the choice of buying onto a trade-up-in-size plan, or renting from a local dealership or from one of the online companies (I like Shar Music and Southwest Strings. The violin outfit includes:
    • Violin;
    • Bow;
    • Violin case and rosin.

This list shows you what materials you’ll need when getting started with violin lessons. As you can see, some items are age-specific and therefore not appropriate for all beginners.

String Pedagogy Talk at Colorado State University

In November, 2012 I was asked to speak, as a Suzuki Teacher Trainer in violin to the String Pedagogy class at Colorado State University, here in Fort Collins. The talk I gave was about the progression and development of the skills necessary to successfully fulfill the requirements of the Suzuki Violin School Books 1 through 4.
These core ideas I covered during my presentation were:

  • Developing good intonation;
  • Developing successful and pleasing use of the bow;
  • Developing successful note reading skills;
  • An overview of the desired level of achievement for the repertoire.

In the coming weeks, I’ll publish some of these core ideas to my blog to share with any readers who may be interested. Stay tuned!