The Value of Improvisation in Music Education

learn+violin
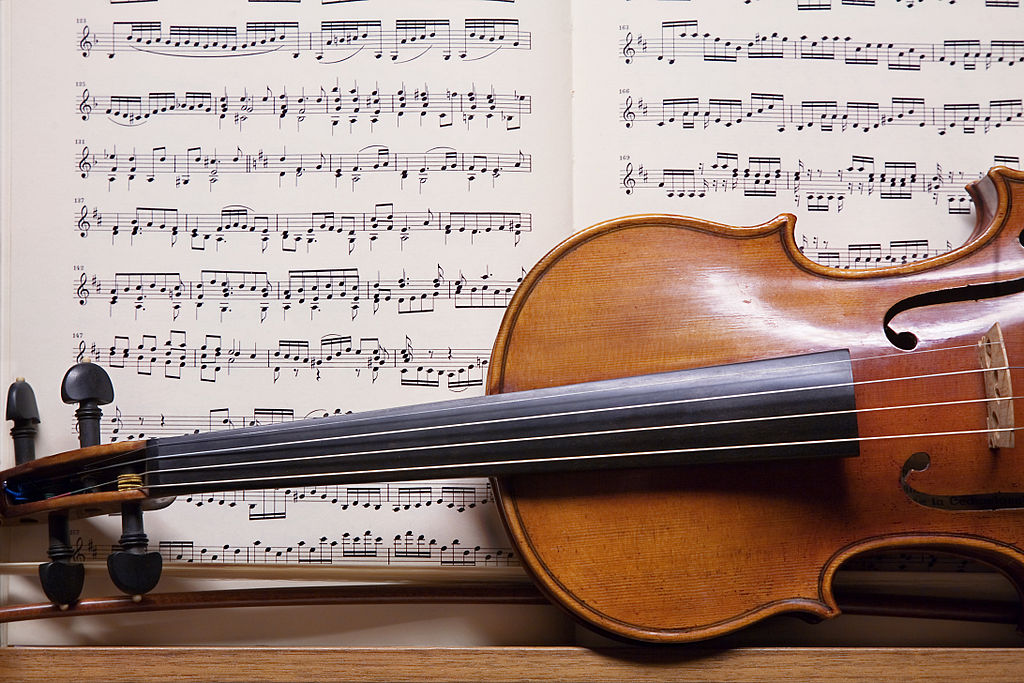
I was recently contacted by fellow strings teacher, Liam Calhoun. He wrote a blog post that I found very much in line with my views on improvisation in music education. I like the thinking in this piece! For example, in reality, are improvisation and creativity really in opposition with technical skills and sight reading, or are these concepts/entities two sides of the same coin of being a fine musician? I agree with the latter idea. We have indeed for too long divided “classical” orchestral and chamber music playing according to a given score, from the more free wheeling improvisation in it’s own right, or improvisation on a known melody or theme. We have seen these two venues as two different kinds of music, which in a sense, they are. However modern usage is blurring the distinctions of this kind and we are beginning to see just music. I like this trend. Liam gives further ideas.

I also like his thinking on “playing by ear”. Of course it is a vital part of the whole. When I play “from memory” my ear is definitely guiding me as well as muscle memory especially in the more technical parts. Playing by ear also opens up more space in the improvisation area. One can transpose a melody or theme more easily. One can hang on to the theme and weave an improvisation around it.

One more thought. The students and their families who come to us come with their own ideas of what photo-1431069767777-c37892aa0a07their favorite musical activities might be. Some are not a whit interested in doing a Mozart Concerto, but would think they had reached the mountain top if they could participate in a garage band with their friends. Well, the I, IV & V7 chords that we teach in the Royal Conservatory of Music theory work are indeed the same chords used in lead sheets for the garage band or the church praise band. I have a family now in which big sister can play the arpeggio form of the chords while little brother plays Twinkle. They can do it in A major, D major and G major. The grins are the rewards! Why not meet people where they are?

Suzuki Talent Education and the Growth Mindset

Salzburg Violin
© Jorge Royan

I so like this interview, and what Carol Dweck is describing as the growth mindset. It fits in nicely with the philosophy of teaching of Shinichi Suzuki. The use of appropriate praise is part of his teaching. Also, the idea of ongoing growth and development of technical skills, musical understanding and personal growth.

I like to show a student two ways of doing something, likely the way they just did it and a more effective way of doing it and then ask them if the two ways were different or the same and encourage and guide them to figure out the difference for themselves. Then we also look at how the new method is done. Then of course, the next question is, can you do it that way? I provide encouragement and guidance where needed for them to use their wits and abilities to work it out for themselves. This gives them a chance to be proud of themselves and learn the value of working their problem through for themselves.

I highly recommend both the interview and the book below; I find them congruent with the philosophy of the Suzuki Method.


Going Over the Basics

A student put the following question out on Tumblr recently:

Small Child Playing Violin. Believed to be in Public Domain From Library of Congress, Prints and Photographs Collections.
From Library of Congress, Prints and Photographs Collections.

I’ve played violin for about 5 years but only in the school orchestra. Our teachers were never very good so I’m still kind of awful at understanding how keys and scales work and all fit together ( this is embarrassing omg) so basically I was wondering if you can think of any sources (preferably online) that go over all of the basics so I can review and finally understand what it is I’m playing? Thank you so much 🙂

While there a numerous online resources for this (and others on Tumblr have mentioned a few, such as Teoria), if you want a paper book to work your way through, there are some good ones specifically for string instruments:

Either of the theory sets listed above will take you progressively through the basic steps and lead you to a good understanding of music theory. The note reading book is a good beginner book for reading music.

What is a Cadenza?

The baroque and classical composers included in their concertos a spot where the orchestra could stop, and the performer was on his own to improvise on the theme of the movement he had just performed, in order to show off his virtuosity, but also his ability to improvise. This was the Cadenza. Antonio Vivaldi wrote several student concertos, possibly for his students. On this video, my student, Ryan is playing the 1st movement of the Vivaldi A minor concerto, which is a student concerto. I took the liberty to designate a spot for Ryan to add in his own improvised cadenza. Ryan’s cadenza is a little different each time he does it.

This video was taken at one of my students monthly play-ins. We get together informally and play what has been prepared for the occasion, like an informal recital, at Everyday Joe’s, a local coffee house. There is background noise from the coffee house patrons, but do enjoy anyway!

Video on Improvisation on the Violin

I recently read this article on Christian Howes’ blog and right away I understood that this violin/improvisation teacher is passionate about teaching improvisation to children. This is right up my alley! I could not possibly write a better intro to this site and the Bach case study than what Chris wrote himself on his site.

Before I got heavily into jazz, I improvised using the only vocabulary I knew. Jazz has a history of drawing from classical composers, but I predict an explosion of new music once improvisation is taught to classical musicians from an early age.

This so exactly states my view!!! That is why I have spent time and energy organizing my experiments in teaching the first baby steps in improvisation to my young Suzuki students, into a booklet, Elements of Music Theory/Improvisation. Here is Chris’ video below. Enjoy and be sure to check out his site as it is full of great resources!


Practice Techniques and Positions

Another Tumblr blogger reached out to me recently with the following message:

Hi Elaine… I would love to discuss practice techniques & the various complexities that you have found, learning, in your personal practice sessions. What do you enjoy most about the violin? Which position do you find more difficult, fifth position or second position, and why?

Practice techniques

Well when people want to get into this subject, I usually steer them to the book, Basics by Simon Fischer, Edition Peters, 300 exercises and practice routines for the violin. He covers everything, believe me! And it is a big subject, for sure!

What do I enjoy most?

Well, I would say, making beautiful music, also playing with other people.

Positions

Fifth position or second position, which is more difficult? Fifth position is of course, the same fingering as first position, but over a string and up the finger board to where the hand can get caught on the violin box (it actually doesn’t need to if we are willing to stay free). Second position is not difficult either. It has just been largely neglected in some circles and therefore it tends to be unfamiliar. In the European system, one learns all the two octave scales using all four strings, staying in one position for each scale. If we realize that we are only playing by ear and not aware of what notes are being played, we can play and name the notes as we go. This is a great exercise for learning key signatures!

Shinichi Suzuki basically uses this system in his book Position Etudes. He gives exercises for getting to the position and then the student plays Perpetual Motion in each position, in each key possible. I have the student do the two octave scales at the same time so they get playing the scale while naming the notes, exercises to get to the position, and playing a familiar melody in each position to get used to the feel of the position. I don’t find second position more difficult than other positions.

Thanks for your questions.

Teaching Vibrato

A new violin teacher reached out to me recently on Tumblr (where he goes by TheVoraciousEar) to ask the following question:

Do you have any tips or exercises or resources that would be useful when it comes to teaching vibrato?

I’m devoting this blog post to answering this question by outlining how I teach students vibrato. Below is the response I gave on the subject.

First Step: how do you (as the teacher) do vibrato? There is an arm vibrato, wrist vibrato and finger vibrato. Most people do some combination of these methods. It helps to understand what you do and to be able to lay out the steps involved.

When I teach vibrato, I start with the student not holding the violin, but rather we both hold both our arms in front of the body with hands and wrists free and relaxed. Then we rhythmically flop the hands by an impetus from the fore arm, as we count 1,2,3,4, 1,2,3,4, etc. That is the assignment for the first week.

Second Step: the next assignment is to put the violin on the shoulder and place the hand roughly in third position with wrist against the violin box, second finger on A string. The finger must be relaxed and willing to change shape because now it rolls up and down the string as the hand moves back and forth along the neck of the violin, from the wrist, thumb and hand totally free and relaxed with no clenching. Second finger can try each string, hand and arm adjusting under the violin to reach the different strings comfortably. This is the assignment for the second week.

Third Step: Next assignment is to transfer this action to the other fingers. First finger needs to be free at the base which is against the violin most of the time. Taking the thumb off the violin neck can loosen the hand. Also, with thumb on violin neck, the student can practice “push away, touch“. That is, the hand and thumb open up as the base of the first finger pushes away from the violin neck and then touches again. The hand needs to be able to move along the violin neck freely, back and forth.The other fingers learn from the second and first fingers. Fourth finger is often weak and can cave in. Sometimes I let the student use third finger along with fourth in the beginning to get the motion going. The student is still working in third position with third position notes. All this can take several weeks.

Fourth Step: Next assignment is to transfer this action to first position. With the hand in third position and the hand against the violin box, the wrist remains still and the hand moves back and forth which is what we want. Sometimes when the student moves to first position, suddenly the hand remains still and the wrist pumps back and forth. In this action the finger does not roll, so no vibrato and the emphasis now is to achieve the same action in first position as in third position.

Fifth Step: Next assignment, likely some time later, learn to let a slight impetus come from the fore arm, to move the hand back and forth at the wrist with more speed and energy.

Well, there is a quick outline of how I teach vibrato. It can be done!

Cheers, courage and good luck!

For more info and Exercises and Practices, see “Basics” by Simon Fischer, Edition Peters. Part G – Vibrato pages 213 to 226

SAA Conference and Improvisation

I attended the Suzuki Association of the Americas 2014 Conference in Minneapolis, MN, held May 22 to 26. I was delighted to find other people doing improvisation with young children there and holding sessions on their experiences.

The first one I heard was John Hamil from the Kansas City area. He is a bassist and teaches young children as well as older ones. He brings them into improvisation by means of some of the basic bassist skills needed in pop band gig work. He then develops these concepts into more advanced techniques. That sounds practical to me.

The next Improvisation session I attended was was done by Lisa Rebecca Caravan and Meredith Blecha-Wells, both cellists. They worked with cello students to show how they start improvisation work in their studios. They also start with basic skills that the beginning student has and give them a new idea; make something up within a given framework/key. Then they moved on to more parts of the improvisation set up. The kids pick it up easily when we start simply and they feel at ease.

The third Improvisation session I attended was given by Nancy Modell of Springfield, NJ. She brought video recordings of her piano students performing their compositions. She explained how she leads them to composition by way of improvisation, which of course is a natural progression. She has them perform their pieces in a performance setting, for parents and friends. They love the sense of accomplishment.

I was so excited by being able to watch others teach improvisation and talk about what they are doing. I don’t feel like I’m the only one with this idea. I’m happy that the idea is gaining traction in studios around the country.

Improvisation and the Suzuki Method

I have been asked before

“How do you get started doing improvisation with the Suzuki Method?”

Well, I answer by explaining the steps I take with each student.
I have my young students learn to play the one octave A major, D major and G major scales, first in pizzicato, and then using rhythmic bow strokes. We sing a little song to learn the scale:

The little train goes up the hill. The little train comes down again.

Singing the notes of the scale to the words above, is quite easy and once they can sing it, they can play it. Once they play it on the violin, I tell them that they have just played the A major scale.

While they are learning the book 1 pieces, I have them use only the notes of one of these scales (they pick which one) to make up a little tune. I like to take advantage of the time and effort they are putting into playing the little folk tunes from the first half of the Suzuki Violin School Book 1. During this time, they are listening to the book 1 CD, also singing words to the tunes and then reproducing the tunes on the violin. I think that is a good time to let them start to make up their own tunes also. When we begin to improvise, we start by mixing up the notes of the scale we have chosen to make one phrase of music. There is only one rule:

“Start on the key note – the first note of the scale you have chosen – and end on the same note. Do whatever you want to in between.”

We keep doing that until it is easy. Then we add meter and when the student is ready, we can use the metronome for the beat.

Then as they learn the arpeggios, we can ease into the use of chords that fit under a tune, i.e. Twinkle. I plan to address these concepts a bit further in my next post.

Below is a another video of brothers Tristan and Zane, playing a fiddle arrangement found in a collection by Carol Ann Wheeler of the folk tune, Go Tell Aunt Rhody, plus improvisation around that tune.

Fiddle Arrangement

Here is a fiddle arrangement of Twinkle Twinkle Little Star, played by brothers Zane and Tristan. Older brother Tristan is playing an improvisation on the melody and I am accompanying them both on guitar. I like to get siblings playing together if they are interested in that. It adds interest for them and in these two boys instance, they are practicing something they really like doing. Tristan is very interested in improvisation. Sometimes I call it “applied theory”. You have to get acquainted with the chords and how they move to be able to fit into what is going on. Variations come as one gets comfy with simple harmonization that fits.
Enjoy!