New Booklet

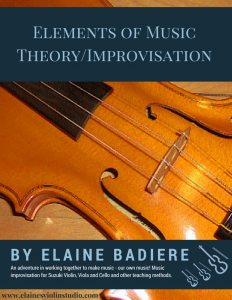
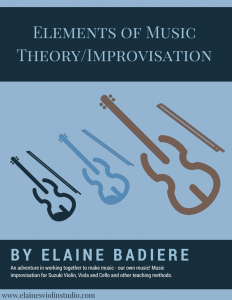
I made some revisions to my booklet, Elements of Music Theory/Improvisation, and gave it a new cover. I actually had two new covers made and would like to get some help in choosing which one I should keep. Other than the covers, all contents of each booklet are identical. Please download the version that has the more attractive cover, in your opinion. I will keep the one that gets the most downloads.

Elements of Music Theory/Improvisation
Version A
Elements of Music Theory/Improvisation
Version B

***Update***

While we received a lot of votes for both covers, we received slightly more for version B. I’m now adding new material and finalizing my Master booklet as well as one each for violin, viola and cello and these will be available for purchase soon!

Suzuki Talent Education and the Growth Mindset

Salzburg Violin
© Jorge Royan

I so like this interview, and what Carol Dweck is describing as the growth mindset. It fits in nicely with the philosophy of teaching of Shinichi Suzuki. The use of appropriate praise is part of his teaching. Also, the idea of ongoing growth and development of technical skills, musical understanding and personal growth.

I like to show a student two ways of doing something, likely the way they just did it and a more effective way of doing it and then ask them if the two ways were different or the same and encourage and guide them to figure out the difference for themselves. Then we also look at how the new method is done. Then of course, the next question is, can you do it that way? I provide encouragement and guidance where needed for them to use their wits and abilities to work it out for themselves. This gives them a chance to be proud of themselves and learn the value of working their problem through for themselves.

I highly recommend both the interview and the book below; I find them congruent with the philosophy of the Suzuki Method.


Going Over the Basics

A student put the following question out on Tumblr recently:

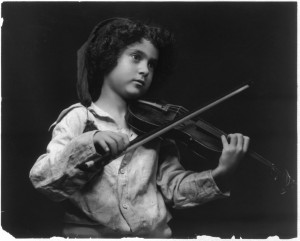
Small Child Playing Violin. Believed to be in Public Domain From Library of Congress, Prints and Photographs Collections.
From Library of Congress, Prints and Photographs Collections.

I’ve played violin for about 5 years but only in the school orchestra. Our teachers were never very good so I’m still kind of awful at understanding how keys and scales work and all fit together ( this is embarrassing omg) so basically I was wondering if you can think of any sources (preferably online) that go over all of the basics so I can review and finally understand what it is I’m playing? Thank you so much 🙂

While there a numerous online resources for this (and others on Tumblr have mentioned a few, such as Teoria), if you want a paper book to work your way through, there are some good ones specifically for string instruments:

Either of the theory sets listed above will take you progressively through the basic steps and lead you to a good understanding of music theory. The note reading book is a good beginner book for reading music.

Video on Improvisation on the Violin

I recently read this article on Christian Howes’ blog and right away I understood that this violin/improvisation teacher is passionate about teaching improvisation to children. This is right up my alley! I could not possibly write a better intro to this site and the Bach case study than what Chris wrote himself on his site.

Before I got heavily into jazz, I improvised using the only vocabulary I knew. Jazz has a history of drawing from classical composers, but I predict an explosion of new music once improvisation is taught to classical musicians from an early age.

This so exactly states my view!!! That is why I have spent time and energy organizing my experiments in teaching the first baby steps in improvisation to my young Suzuki students, into a booklet, Elements of Music Theory/Improvisation. Here is Chris’ video below. Enjoy and be sure to check out his site as it is full of great resources!


Practice Techniques and Positions

Another Tumblr blogger reached out to me recently with the following message:

Hi Elaine… I would love to discuss practice techniques & the various complexities that you have found, learning, in your personal practice sessions. What do you enjoy most about the violin? Which position do you find more difficult, fifth position or second position, and why?

Practice techniques

Well when people want to get into this subject, I usually steer them to the book, Basics by Simon Fischer, Edition Peters, 300 exercises and practice routines for the violin. He covers everything, believe me! And it is a big subject, for sure!

What do I enjoy most?

Well, I would say, making beautiful music, also playing with other people.

Positions

Fifth position or second position, which is more difficult? Fifth position is of course, the same fingering as first position, but over a string and up the finger board to where the hand can get caught on the violin box (it actually doesn’t need to if we are willing to stay free). Second position is not difficult either. It has just been largely neglected in some circles and therefore it tends to be unfamiliar. In the European system, one learns all the two octave scales using all four strings, staying in one position for each scale. If we realize that we are only playing by ear and not aware of what notes are being played, we can play and name the notes as we go. This is a great exercise for learning key signatures!

Shinichi Suzuki basically uses this system in his book Position Etudes. He gives exercises for getting to the position and then the student plays Perpetual Motion in each position, in each key possible. I have the student do the two octave scales at the same time so they get playing the scale while naming the notes, exercises to get to the position, and playing a familiar melody in each position to get used to the feel of the position. I don’t find second position more difficult than other positions.

Thanks for your questions.

Teaching Vibrato

A new violin teacher reached out to me recently on Tumblr (where he goes by TheVoraciousEar) to ask the following question:

Do you have any tips or exercises or resources that would be useful when it comes to teaching vibrato?

I’m devoting this blog post to answering this question by outlining how I teach students vibrato. Below is the response I gave on the subject.

First Step: how do you (as the teacher) do vibrato? There is an arm vibrato, wrist vibrato and finger vibrato. Most people do some combination of these methods. It helps to understand what you do and to be able to lay out the steps involved.

When I teach vibrato, I start with the student not holding the violin, but rather we both hold both our arms in front of the body with hands and wrists free and relaxed. Then we rhythmically flop the hands by an impetus from the fore arm, as we count 1,2,3,4, 1,2,3,4, etc. That is the assignment for the first week.

Second Step: the next assignment is to put the violin on the shoulder and place the hand roughly in third position with wrist against the violin box, second finger on A string. The finger must be relaxed and willing to change shape because now it rolls up and down the string as the hand moves back and forth along the neck of the violin, from the wrist, thumb and hand totally free and relaxed with no clenching. Second finger can try each string, hand and arm adjusting under the violin to reach the different strings comfortably. This is the assignment for the second week.

Third Step: Next assignment is to transfer this action to the other fingers. First finger needs to be free at the base which is against the violin most of the time. Taking the thumb off the violin neck can loosen the hand. Also, with thumb on violin neck, the student can practice “push away, touch“. That is, the hand and thumb open up as the base of the first finger pushes away from the violin neck and then touches again. The hand needs to be able to move along the violin neck freely, back and forth.The other fingers learn from the second and first fingers. Fourth finger is often weak and can cave in. Sometimes I let the student use third finger along with fourth in the beginning to get the motion going. The student is still working in third position with third position notes. All this can take several weeks.

Fourth Step: Next assignment is to transfer this action to first position. With the hand in third position and the hand against the violin box, the wrist remains still and the hand moves back and forth which is what we want. Sometimes when the student moves to first position, suddenly the hand remains still and the wrist pumps back and forth. In this action the finger does not roll, so no vibrato and the emphasis now is to achieve the same action in first position as in third position.

Fifth Step: Next assignment, likely some time later, learn to let a slight impetus come from the fore arm, to move the hand back and forth at the wrist with more speed and energy.

Well, there is a quick outline of how I teach vibrato. It can be done!

Cheers, courage and good luck!

For more info and Exercises and Practices, see “Basics” by Simon Fischer, Edition Peters. Part G – Vibrato pages 213 to 226

Improvisation of an Accompaniment

Photo credit: Meredith Bell

To start working with the idea of harmonic accompaniment to tunes or improvisation, I start with “Twinkle Twinkle” in A major. I make sure the student understands the A major scale and arpeggio set.

Next, I give them a simple accompaniment pattern and show how to put it in all keys. Here is an example. Then I also give them a chord chart. The part marked “guitar” contains all the first position notes the violin player can choose from for the pattern. Of course not even the guitar plays all the notes given. The letter names above the chords indicate the name of the chord as the guitar player uses it. The roman numerals below the chords indicate their relationship to the A Major scale.

The first pattern on the “Patterns and Keys” document gives the chord patterns beginning on the open strings, G, then move to D and repeat, move to A and repeat. The second pattern starts with the A major chord pattern beginning on the G string. That gets out of the range of the written “Twinkle”. I use this set up until the student can play the accompaniment to “Twinkle” guided by his/her ear. I like for them to be able to do that in D major and G major also. At that point we can try another tune.

Improvisation and the Suzuki Method

I have been asked before

“How do you get started doing improvisation with the Suzuki Method?”

Well, I answer by explaining the steps I take with each student.
I have my young students learn to play the one octave A major, D major and G major scales, first in pizzicato, and then using rhythmic bow strokes. We sing a little song to learn the scale:

The little train goes up the hill. The little train comes down again.

Singing the notes of the scale to the words above, is quite easy and once they can sing it, they can play it. Once they play it on the violin, I tell them that they have just played the A major scale.

While they are learning the book 1 pieces, I have them use only the notes of one of these scales (they pick which one) to make up a little tune. I like to take advantage of the time and effort they are putting into playing the little folk tunes from the first half of the Suzuki Violin School Book 1. During this time, they are listening to the book 1 CD, also singing words to the tunes and then reproducing the tunes on the violin. I think that is a good time to let them start to make up their own tunes also. When we begin to improvise, we start by mixing up the notes of the scale we have chosen to make one phrase of music. There is only one rule:

“Start on the key note – the first note of the scale you have chosen – and end on the same note. Do whatever you want to in between.”

We keep doing that until it is easy. Then we add meter and when the student is ready, we can use the metronome for the beat.

Then as they learn the arpeggios, we can ease into the use of chords that fit under a tune, i.e. Twinkle. I plan to address these concepts a bit further in my next post.

Below is a another video of brothers Tristan and Zane, playing a fiddle arrangement found in a collection by Carol Ann Wheeler of the folk tune, Go Tell Aunt Rhody, plus improvisation around that tune.

Scales with Twinklers

As most of you know, beginners in the Suzuki method start off learning how to play Twinkle Twinkle Little Star. This  is a very simple and well known children’s song, so chances are, the student can already sing the melody. Because the first set of pieces learned in the Suzuki method are variations on this song, we call our beginners, Twinklers. Our Twinklers can learn their first scale by singing it and I often sing it to the following words, (one syllable for each note in the scale):

“The little train goes up the hill. The little train comes down again.”

(The first sentence is the scale going up and the second is the scale coming back down – one octave.) I will play the scale for them, first pizzicato (i.e. plucking the notes rather than bowing) then the student does the same and practices this at home. Then we can bow a fun rhythm and it can become a monkey song – a good activity to insert between the focused learning tasks.

On the violin the first scales we learn are A major, D major and G major, while on viola it is D major, G major and C major. The student may start his or her scales in pizzicato (this removes the challenge of using the bow correctly, so we can just focus on the notes of the scale in the beginning). Then I have the student go up the scale naming each note as he or she goes, for example:

“A, B, C#, D, E, F#, G#, A”

And they turn around and go back down again.

When they know the names of the notes on their instrument, they are ready to name the notes on the staff and effectively to begin reading music. This is where I recommend using I Can Read Music: A Note Reading Book for Violin Students (Volume 1). (Also available: I Can Read Music: For Viola Volume 1 and I Can Read Music: For Cello, Volume I). I use this book for various activities. When the book is open to lesson one, the Pitch page is on the left and the Rhythm page is on the right. For the Pitch page, the student names the notes and then plays them, one line at a time. For the Rhythm page, the student claps and counts and then plays and counts, one line at a time.

By the middle of the Suzuki Book 1, I have the students put the book on the stand and point to the notes as they listen to the recording and then practice. This is the daily routine.

New Student Materials Checklist

When parents ask me what materials will be needed for beginner lessons, I recommend the following items:

  • Notebook and pencil for Mom or Dad, whomever is the practice companion at home;
  • Foot position mat for the child (I show you how to make one);
  • For quite a young child (under 5 years old), a home-made cardboard or a purchased foam “violin” may be used for a short time. This allows the youngster to:
    • Become accustomed to placing and holding the instrument correctly on the shoulder;
    • Learn how to carry and balance the instrument correctly;
    • Learn how to tap fingers in good form; and,
    • Learn how and where to place the “bow.”
  • When the child is ready to use a “real” violin, the teacher can measure the child’s arm to determine the size required. The parent has the choice of buying onto a trade-up-in-size plan, or renting from a local dealership or from one of the online companies (I like Shar Music and Southwest Strings. The violin outfit includes:
    • Violin;
    • Bow;
    • Violin case and rosin.

This list shows you what materials you’ll need when getting started with violin lessons. As you can see, some items are age-specific and therefore not appropriate for all beginners.